Thursday, January 5, 2012

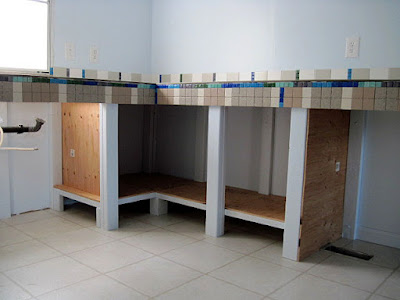
Kitchen Counter Top - Check!

We ate breakfast on the completed kitchen counter top last week. Yee Haw! OK, so the sink is not quite hooked up, but that is nothing that a bucket under the sink can't fix.

Thank you Overstock.com for the cool stools.


Tile placement gets creative when you don't want to haul out the tile saw again.


It's like a greywater system, kinda.

Yeah, there's some painting that needs to be done, but hey, we can do that in our sleep!


Snow, Mud and Poopcicles

We had a goodly amount of snow at the homestead near the end of December. Then we had Chinook winds that melted a lot of the snow. Then we had the roof of the barn blow off  from the Chinook winds, and other parts cave in. Then we had mud. Dakota (MegaHoof to his friends) left enormous piles of poop in the month that we were absent. These provided extra nutrition and entertainment for the dogs. Uck. It was a messy visit.

Well preserved by the cold.


No, my name has not just been yelled for the 14th time so I'll stay away from the poopcicles. I always slink like this.


I DO NOT have something hidden under my paw. You are so suspicious.

I am no mud expert, but this mud seems particularly finely textured. The is the bit that froze onto the sole of my boot.


And then there is the barn. We waited for the wind to die down before collecting the sheets of tin roofing in the hope that we could keep our heads attached to our bodies a bit longer.


Here's hoping there may be some insurance money in our future! (Hey, I can dream.)

Redneck Entertainment Center

Supplies and Instructions for the Redneck Entertainment Center:
One disassembled wood stove crate
Assorted 2x4s
Screws
Cardboard (to keep the wood debris out of the TV vent slots)
One very handy redneck, preferably hairy and/or a Ginger

Assemble at will.
Stand back and smile.
Fill with stuff.


In Permaculture, this is called 'stacking functions'.


Morso Wood Stoves Rock!

So finally, the wood stove is in, and what a heatin' machine it is! Yes, it is smaller and more oddly shaped than most, but it fires up quickly and is very responsive to added fuel.


The first fire!
Luckily, the hassle of getting the correct pieces of the stovepipe has faded, and now we just enjoy it. We even cooked eggs on it!

So here is a series of photos showing the hearth and heat shield construction and the final stove business.


First, the inspection.

The Durock used as a heat shield and the metal spacers to allow air flow behind it.

Mikey securing the Durock.

The theory is that air flow behind the heat shield will allow excessive heat to dissipate and not set the wall on fire.

We agreed to keep the cost WAY down by using only tiles from The ReStore, Craig's List or leftovers from our own projects.

Attaching the adaptor.

Almost there...

Hearth trim installed and everything! (Note the charred log that I tried to force in. Oops.)

Chillin'!